
Welcome to our creative kitchen! Today, we’re whipping up a delightful treat that’s perfect for cat lovers and cake enthusiasts alike – a stunning Black Cat Cake. This isn’t your ordinary cake; it’s a work of art that’s both a visual feast and a delectable dessert. Ready to create a purr-fect masterpiece? Let’s get started!
Ingredients:
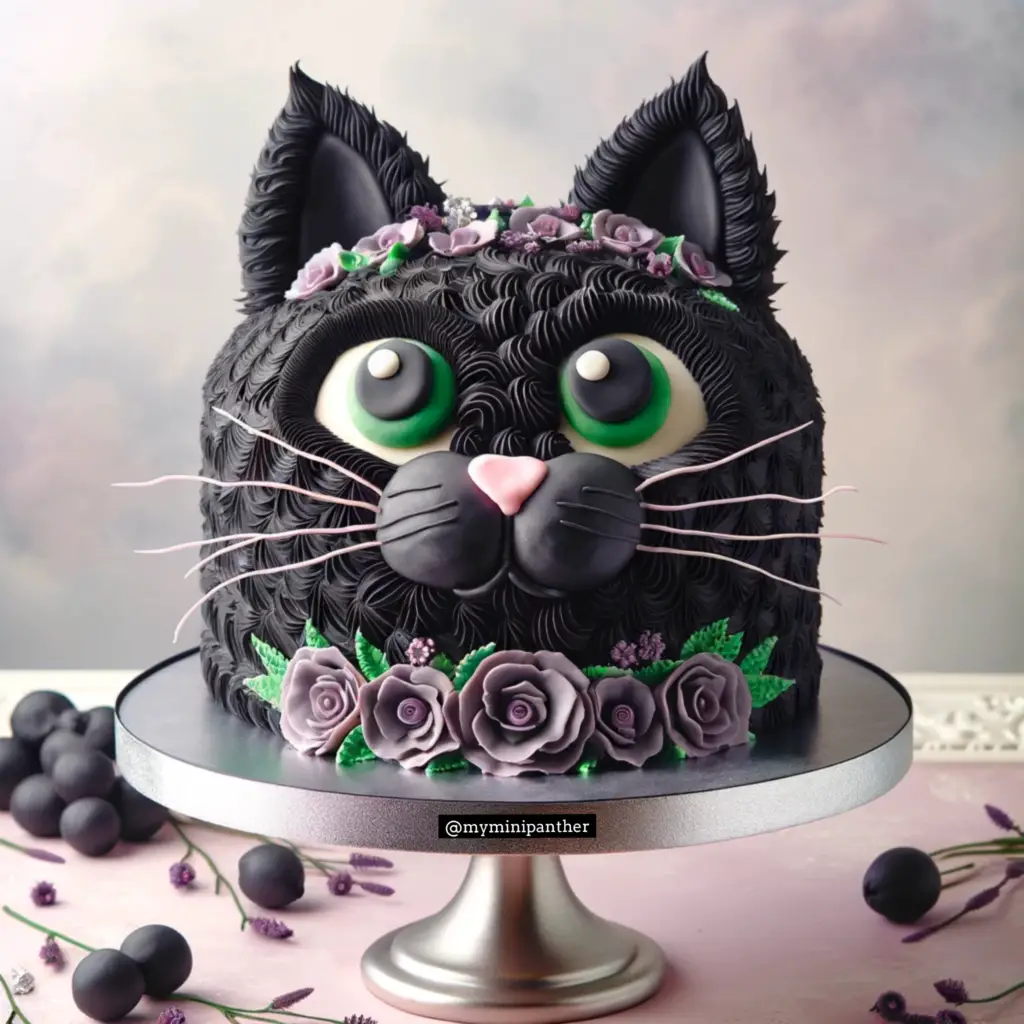
- Your favorite cake recipe (chocolate works great for the black color)
- Black fondant
- White fondant
- Green fondant
- Pink fondant
- Edible glue
- Black food coloring (if needed)
- Cake dowels (for structure)
Tools:
- Rolling pin
- Fondant tools
- Cake board
- Wire whisk
- Sculpting tools
- Small paintbrushes
Instructions:
- Bake the Cake: Start by baking your favorite cake in a round mold. Once baked, let it cool completely before trimming the top to create a flat surface.
- Layer and Carve: Stack the cakes using your favorite filling between layers. Carve the cake into a round, cat-head shape with a slight dome on top.
- Fondant Work:
- Roll out the black fondant to cover the cake, smoothing it out to remove any air bubbles.
- Create the cat’s facial features: form two ears from black fondant, two large green circles for the eyes, small pink fondant shapes for the nose, and thin strips of white fondant for the whiskers.
- Add Details:
- Use a fondant tool to add fur-like textures to the black fondant.
- Attach the ears to the top of the head with edible glue.
- For the eyes, place the green fondant circles on the face, and add smaller black circles with a tiny white dot to mimic the look of a cat’s eye.
- Attach the pink nose and white whiskers.
- Floral Decorations:
- Roll out purple and green fondant to create rose shapes and leaves. Attach them around the base of the cake and add a few on top, around the ears, for a whimsical touch.
- Final Touches:
- If the black fondant isn’t dark enough, consider adding black food coloring to achieve the desired shade.
- Insert cake dowels where needed for extra support.
- Presentation: Place your finished cat cake on a cake stand, and if you like, scatter some faux berries around for an extra decorative element.
Conclusion:
There you have it, a breathtaking Black Cat Cake that’s sure to impress at any gathering. Remember, the key to this cake is patience and attention to detail. Enjoy the process and have fun with it – after all, that’s what cake art is all about!
Remember to always handle food coloring and decorations with care, and ensure everything is food safe and edible. Happy baking!
The following two tabs change content below.

Lee Harris
I'm a Brit living in the sunny Canary Islands with my beautiful wife and my wonderful black cat called Coco. I love to blog, build businesses, look after my body, and enjoy nature...
Latest posts by Lee Harris (see all)
- Homemade Cat Cookies: A Purr-fect Treat for Any Occasion - February 7, 2024
- Chic Feline Elegance: Crafting a Multi-Tiered Black Cat Cake - February 6, 2024
- Purr-fectly Delicious: Black Cat-Themed Donut Delight - February 5, 2024
